NetoMeter Blog
Main Site >>
NetoMeter Blog
NetoMeter Blog
Latest Videos
  • Home
  • Windows Server
  • Exchange Server
  • SharePoint
  • Tools
    • ACMEExchange Client
Main Site >>
Sunday, November 8, 2026
NetoMeter Blog
NetoMeter Blog
  • Main Site >>
  • Home
  • Windows Server
  • Exchange Server
  • SharePoint
  • Latest Videos
  • Upcoming
Main Site >>

©2024 NetoMeter All Right Reserved.
Free ScreencastsVirtualization

Hyper-V: How to Change Screen Resolution in CentOS / Red Hat Virtual Machines

by admin March 3, 2015


Free Video :Hyper-V: Change Resolution in CentOS (Red Hat) VM

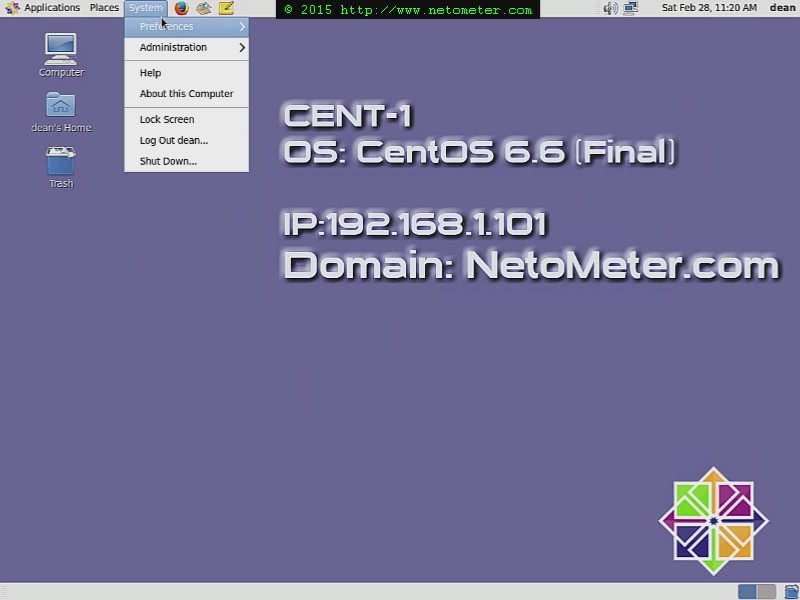
One of the common problems that you hit when installing the GUI in a CentOS (Red Hat) Hyper-V guest is changing the default screen resolution – 1152×864. Most of the published solutions are for Ubuntu Hyper-V guests, and if you’ve come here, you are probably aware that they are not applicable for CentOS and Red Hat VMs.

In this short video, we demonstrate how to change the screen resolution in CentOS and Red Hat Hyper-V Virtual Machines using the grubby tool. The instructions are valid for both version 6 and version 7 of the OS. For your convenience, we provide the commands that we are using in the video:
# Use “grubby” to update all current and future kernels passing the video argument
# for the Microsoft Hyper-V Synthetic Video Frame Buffer driver
grubby –update-kernel=ALL –args=”video=hyperv_fb:1024×768”

# A reboot is required to apply the changes:
reboot

Tweet #HyperV #CentOS Follow @netometer
Hyper-V: How to Change Resolution in CentOS/Red Hat Virtual Machines

Tweet #Linux Follow @netometer

  • Hyper-V: How to Change Screen Resolution in Ubuntu Virtual Machines
  • How to Install Exchange 2013
  • How to Configure Outlook Anywhere in Exchange Server 2007
  • How to Install WordPress on Windows Server 2012
0 FacebookTwitterPinterestLinkedinWhatsappTelegramViberEmail
Windows Server 2012

Screencast: How to Demote the Last Server 2003 Domain Controller

by admin February 14, 2015


Screencast :Server 2003 Migrations

  • Perform AD Health Check
  • Clean Up Sites, Services and DNS zones
  • Reconfigure the Time Service
  • Demote the last 2003 DC
  • Raise Domain/Forest FL

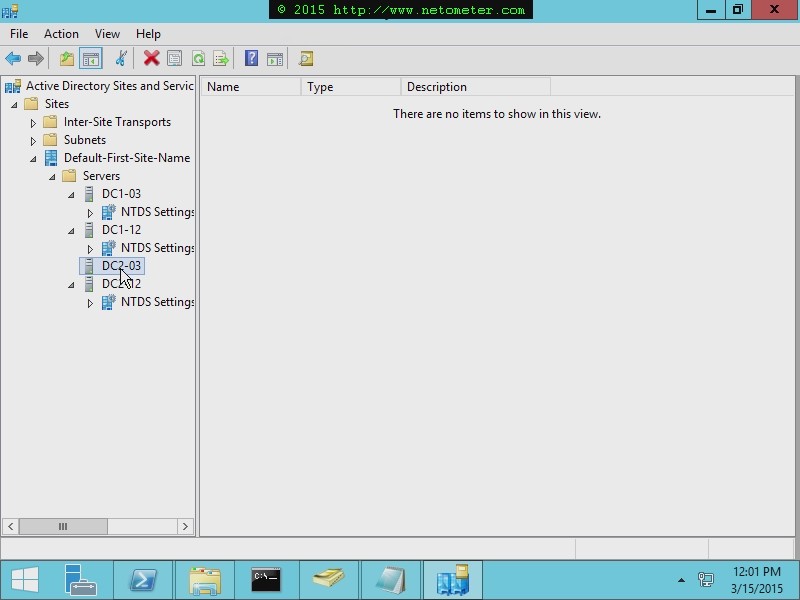
In this Screencast How to Decommission the Last Server 2003 Domain Controller, we demonstrate how to demote the last Server 2003 Domain Controller in the forest ans raise the Domain/Forest functional level. In addition, we go through the recommended Active Directory healthcheck steps and cleanup process.

Demote the Last 2003 DC

🎦 Video: How to Demote the Last 2003 Domain Controller
👉 http://t.co/cT4zQRIyMc
✔ AD HealthCheck
✔ CleanUp Sites & DNS zones
✔ Time Service

— NetoMeter (@netometer) March 28, 2015

  • How to Migrate File Server 2003 to Server 2012 R2
  • How to Upgrade Active Directory Domain to Windows Server 2012
  • How to Add a Second Server 2012 Domain Controller
  • How to Migrate DHCP Server to Windows Server 2012
  • How to Configure Storage Tiers and Write-Back Cache in Server 2012 R2
  • How to Configure DHCP Failover in Windows Server 2012
0 FacebookTwitterPinterestLinkedinWhatsappTelegramViberEmail
Windows Server 2003Windows Server 2012

Migrate File Server 2003 to Server 2012 R2

by admin February 12, 2015


Screencast :Server 2003 Migrations

  • Consolidate multiple legacy servers
  • Preserve share paths and security permissions
  • Minimize downtime and avoid reconfiguring clients and applications

In this Screencast How to Migrate Server 2003 File Servers to Server 2012 R2, we demonstrate how to migrate and consolidate multiple Server 2003 file servers to Server 2012 R2.

The key requirements in this project are:
– Preserving the existing Sharing and Security permissions.
– Preserving the UNC Share paths, so no reconfiguration of the clients and applications are required.
– Minimizing downtime

To cover these requirements, we’ll be using the Microsoft File Server Migration Toolkit. It allows you to migrate data in two passes. During the first pass, users can still access the file shares, and you can perform it during regular working hours. The second pass performs the actual cut over, when the delta is copied and applied to the destination shares and client access is interrupted.

When the migration project completes, we demonstrate an elegant way to preserve the UNC paths and restore access to the migrated file shares on the destination server right away, effectively minimizing downtime.

File Server 2003 Migration to Server 2012 R2
Migrate Server 2003 File Server to Server 2012 R2

Screencast: Migrate File Servers 2003 to Server 2012 R2:http://t.co/BgQsrSnCJ4#Server2003 #Migration #NoDownTime

— NetoMeter (@netometer) March 10, 2015

  • How to Demote the Last Server 2003 Domain Controller
  • How to Add a Second Server 2012 Domain Controller
  • How to Configure Storage Tiers and Write-Back Cache in Server 2012 R2
  • How to Configure DHCP Failover in Windows Server 2012
  • How to Migrate DHCP Server to Windows Server 2012
  • How to Upgrade Active Directory Domain to Windows Server 2012
0 FacebookTwitterPinterestLinkedinWhatsappTelegramViberEmail
Free Screencasts

Windows Server 10 – Storage Replication

by admin January 2, 2015


Free Video :Windows Server Technical Preview (Build 9841):

  • Server to Server Replication
  • Recover from Source Disk Failure
  • Recover from Source Server Failure

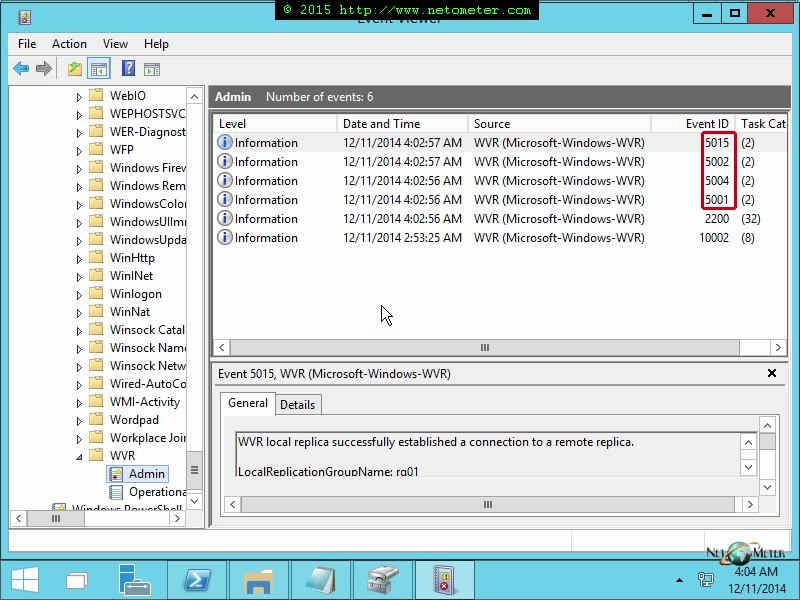
[floated align=”left”]Windows Server 10[/floated] In a series of screencasts, we’ll be presenting some of the most interesting new features in Windows Server vNext. The fact that it comes with the OS (no need of third party products) and is extremely easy to configure certainly qualifies Storage Replica as one of these features.
There are two Storage Replica scenarios:

  • Server to Server replication
  • Stretch cluster

In this step-by-step screencast, we demonstrate Server to Server replication with two disaster scenarios – source disk failure and losing the entire source server.

For your convenience, we provide the short plan and PowerShell commands used in the demo:

=====================================================================
Windows Server 10 Technical Preview: How to configure Storage Replica
=====================================================================
Server to Server Replication:
1. Configure fierwall rules
Enable-NetFirewallRule -DisplayGroup “Remote Desktop”,”File and Printer Sharing”
2. Install Windows Features
Install-WindowsFeature File-Services, WVR –IncludeManagementTools -restart
3. Prepare Data and Log Volumes
4. Create replication between the nodes
Note:
– Must be run on the source server!!!
– The command will create the specified replication groups on the source and destination nodes
New-SRPartnership -SourceComputerName FS1-10 -SourceRGName rg01 -SourceVolumeName d: -SourceLogVolumeName e: -DestinationComputerName FS2-10 -DestinationRGName rg02 -DestinationVolumeName d: -DestinationLogVolumeName e: -LogSizeInBytes 1gb
5. Create a folder with test data and share it:
1..200 | % {
fsutil file createnew d:\Projects\Project$_.dat (10MB)
fsutil file setvaliddata d:\Projects\Project$_.dat (10MB)
}
6. Simulate Hard Disk failure
7. Recover Disk, re-create partnership using FS2-10 as the source server
New-SRPartnership -SourceComputerName FS2-10 -SourceRGName rg02 -SourceVolumeName d: -SourceLogVolumeName e: -DestinationComputerName FS1-10 -DestinationRGName rg01 -DestinationVolumeName d: -DestinationLogVolumeName e: -LogSizeInBytes 1gb
8. Change replication direction, check folders, shares and permissions
Note: The command must be run on the new source server
Set-SRPartnership -NewSourceComputerName FS1-10 -SourceRGName rg01 -DestinationComputerName FS2-10 -DestinationRGName rg02
9. Export and restore shares and permissions:
# Export the Share registry key
reg export HKLM\SYSTEM\CurrentControlSet\Services\LanmanServer\Shares shareperms.reg
10. Simulate server failure of the Source server and using the replica
# Uninstall WVR (restart required)
Remove-WindowsFeature WVR -Restart
# Clear the hidden attribute with DISKPART
DISKPART
LIST VOLIUME
SELECT VOLUME n
ATTRIBUTES VOLUME CLEAR HIDDEN
EXIT
# Import the shares key on the Destination server:
reg import shareperms.reg
# Restart LanmanServer service
Restart-Service LanmanServer
#Check the shares and permissions on the test folder
Get-SmbShare
Get-SmbShareAccess Projects
11. Add the name of the failed server as an additional name to the replica server
# Delete the DNS record and the Computer account of the failed server on a DC
# Force push replication if there are multiple Domain Controllers
repadmin /syncall /AeP
# Add the name of the failed server on the replica server
netdom computername FS2-10 /ADD:FS1-10.netometer.com
# Check the list of names
netdom computername FS2-10 /ENUM
# Restart the server to apply the settings
# You can remove the name with (if you recover the failed server or start a new one)
# netdom computername FS2-10 /REMOVE:FS2-10.netometer.com

You can download the [tip label=”Text File with Commands” style=”1″ href=”https://www.netometer.com/downloads/Windows-Server-10-Storage-Replica-Video.txt”]PowerShell Commands text Disable Windows Defender[/tip].

Step1: Overview of Windows Server 10 Storage Replica and the setup scenarios.

Step1: Storage Replica - Windows Server 10
Step1: Storage Replica

—————————————————————————————————————————————————————————

Step2: Configuring and validating Windows Server 10 Storage replica.

Step2: Storage Replica - Windows Server 10
Step2: Storage Replica

—————————————————————————————————————————————————————————

Step3: Recovering from Source Data Volume failure.

Step3: Storage Replica - Windows Server 10
Step3: Storage Replica

—————————————————————————————————————————————————————————

Step4: Recovering from Source Server failure.

Step4: Storage Replica - Windows Server 10
Step4: Storage Replica

  • Windows Server 10 – How to Disable Windows Defender
  • How to Configure Tiered Storage in Hyper-V Server 2012 R2
  • How to Connect to Office 365 Using Remote PowerShell. Bulk Creating and Managing Users
  • Exchange 2013 – Custom Receive HubTransport Connector Problem
  • How to Bulk Create Mailboxes in Exchange 2013
0 FacebookTwitterPinterestLinkedinWhatsappTelegramViberEmail
Free Screencasts

Windows Server 10 – How to Disable Windows Defender

by admin December 1, 2014


Free Video :Windows Server Preview

  • Disable/Enable temporary Windows Defender in PowerShell
  • Install Windows Defender Graphical Interface (GUI)
  • Uninstall Windows Defender

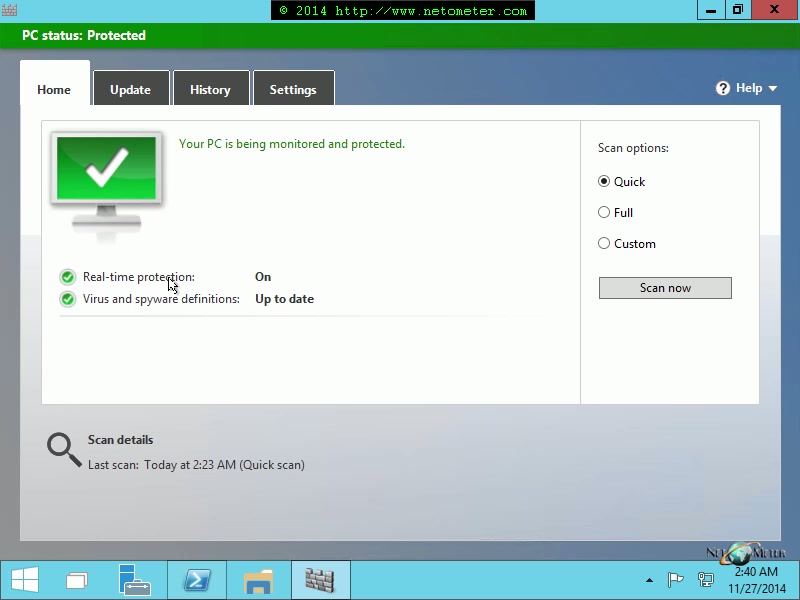
[floated align=”left”]Windows Server 10[/floated] The new Windows Server OS Technical Preview is released and one of the surprises waiting for you is that it comes out of the box with Windows Defender installed and enabled.
There are two main reasons for the surprise:

  • The previous OS version – Server 2012 R2 doesn’t include a malware solution (except Server Core)
  • Windows Defender user interface is not installed by default on Windows Server 10

You can still manage Windows Defender options, but as you can guess, this is performed in PowerShell. Alternatively, you can install use the GUI for Windows Defender. Finally, if you are planning to use a different malware solution or you don’t want the compromise the performance of the system, you can uninstall this feature.

In the following short video, we demonstrate:

  • How to disable or enable temporarily Windows Defender in PowerShell
  • How to install and use Windows-Defender-GUI
  • How to completely remove Windows Defender from Windows Server 10

For your convenience, we provide the PowerShell commands that we are using in the demo:

===============================================================
Windows 10 Server Preview – How to Disable Windows Defender
===========================================================
# Get information about Server roles and features that are available or installed
Get-WindowsFeature
# Turn-off real-time protection
Set-MpPreference -DisableRealtimeMonitoring $true
# Check real-time protection status
Get-MpPreference | FL *RealtimeMonitoring
# Turn-on real-time protection
Set-MpPreference -DisableRealtimeMonitoring $false
# Install Windows Defender GUI (no restart required)
Install-WindowsFeature Windows-Defender-GUI
# Uninstall Windows Defender and its GUI (restart required)
Remove-WindowsFeature Windows-Defender, Windows-Defender-GUI

You can download the [tip label=”Text File with Commands” style=”1″ href=”https://www.netometer.com/blog/wp-content/uploads/Disable-Uninstall-Windows-10-Defender-Server-10.txt”]PowerShell Commands text Disable Windows Defender[/tip].

Windows 10 Server Preview - How to Disable Windows Defender
  • How to Configure Tiered Storage in Hyper-V Server 2012 R2
  • How to Connect to Office 365 Using Remote PowerShell. Bulk Creating and Managing Users
  • Exchange 2013 – Custom Receive HubTransport Connector Problem
  • How to Bulk Create Mailboxes in Exchange 2013
  • How to Install Exchange 2013
0 FacebookTwitterPinterestLinkedinWhatsappTelegramViberEmail
VirtualizationWindows Server 2012

Screencast: How to Configure Tiered Storage in Hyper-V Server 2012 R2

by admin November 30, 2014


Screencast:Hyper-V Server 2012 R2

  • Configure Tiered Storage Remotely – in the GUI
  • Configure Tiered Storage Locally – in PowerShell

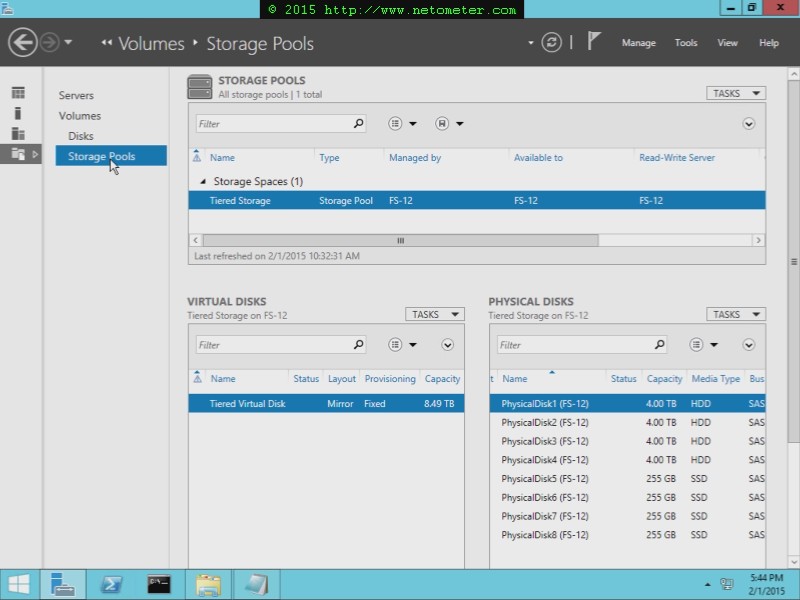
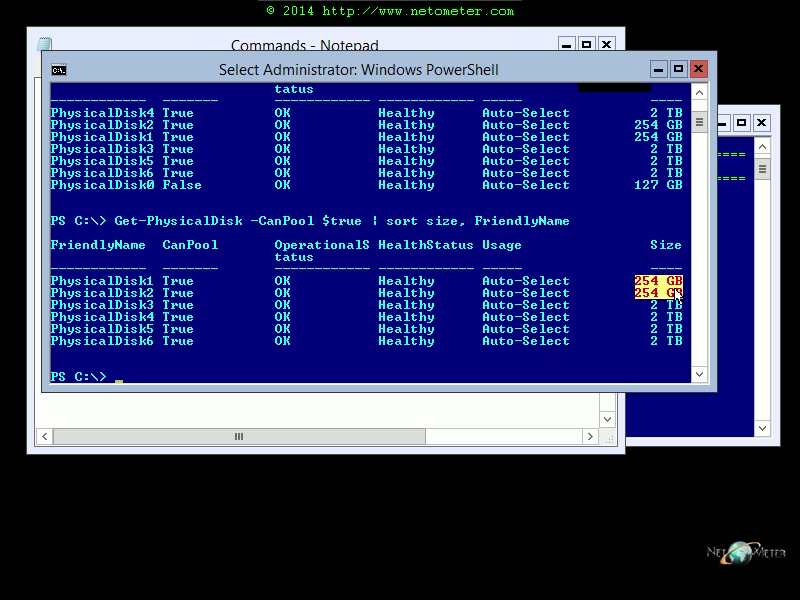
One of the popular misconceptions about the free Hyper-V Server 2012 R2 is that you cannot use Tiered Storage with the free OS version. That’s far from true, and in this step-by-step Screencast Free Hyper-V Server 2012 R2:
How to Configure Tiered Storage, we demonstrate two approaches when configuring Storage Tiers in Hyper-V Server 2012 R2:

– The easy way – connecting remotely from a standard version of Server 2012 R2 and using the GUI.
– The fast way – in PowerShell, locally on the Hyper-V Server 2012 R2, where you have more control over the Tiered Storage parameters.

Hyper-V Server 2012 R2 Storage Tiers
  • Windows Server 10 – How to Disable Windows Defender
  • How to Configure Storage Tiers and Write-Back Cache in Server 2012 R2
  • Free Video: How to Remove a Hyper-V Server 2012 R2 from an Orphaned/Non-Existent Domain
  • How to Connect to Office 365 Using Remote PowerShell. Bulk Creating and Managing Users
  • How to Bulk Create Mailboxes in Exchange 2013
0 FacebookTwitterPinterestLinkedinWhatsappTelegramViberEmail
Latest ScreencastsSharePoint

How to Enable Remote Blob Storage with SharePoint 2013 and SQL Server 2014

by admin October 22, 2014


Screencast :Enable RBS with SharePoint 2013 and SQL Server 2014

  • Two-Tier Configuration – SharePoint and SQL Server running on dedicated machines
  • Using the free SharePoint Foundation and SQL Server Express editions
  • Enabling multiple SharePoint Content Databases

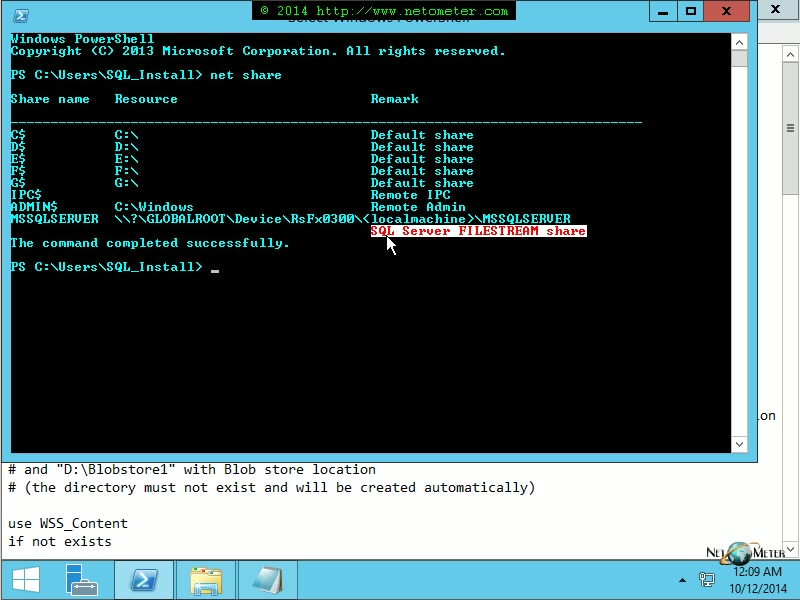
In this Screencast How to Install and Configure Remote Blob Storage in SharePoint 2013 and SQL Server 2014, we demonstrate how to install and configure RBS in SharePoint 2013.

You shouldn’t be surprised if 95% of SharePoint Content Databases is BLOB (Binary Large Objects) data – that’s how SP files are stored in the SQL server database. Moving BLOBSs out of the SQL server DB reduces CPU and memory utilization and results in a significant SharePoint performance boost. An easy way to do this is to use the Microsoft FILESTREAM provider which is provided as a free download in the SQL Server 2014 feature pack.

It is important to note that there are two types of RBS providers:

  • Local RBS Provider – BLOBs are stored on the same machine that is running SQL Server
  • Remote RBS Provider – BLOBs are stored on a separate machine,

and the local RBS FILESTREAM provider is supported only when using local hard disk drives or attached iSCSI devices.

The Local/Remote RBS Provider concept is quite often the source of confusion and misunderstanding, especially when SharePoint and SQL Server are running on separate machines; e.g., Two-Tier implementation. Some of the popular misconceptions are that you cannot use SQL Server 2014 Express edition, or even, that in this case you need SQL Server Enterprise edition. That is far from true, and for the sake of example, we are using a Two-Tier configuration with the free SharePoint 2013 Foundation and SQL Server 2014 Express editions.

We’ve already demonstrated in this video SQL Server 2014 Express Actual Memory Limit that the actual SQL Server 2014 Express buffer cache limit is higher than the official 1GB limit. Another pleasant surprise is that placing the BLOBs on a fast local (SSD) storage not only improves performance, but allows you to work around the 10GB per Database limit in the SQL Server express edition.

When dealing with a real-life scenario, you might have to answer addition questions, like:

  • What kind of permissions you need to have and configure, especially when using the least privilege configuration?
  • Do you need to install the RBS Feature Pack on the SQL Server?
  • How do you enable a second, or a third SharePoint content database for Remote Blob Storage?

[raw]We address in detail all these questions in our step-by-step Screencast How to Install and Configure Remote Blob Storage in SharePoint 2013 and SQL Server 2014[/raw]


How to Install and Configure Remote Blob Storage in SharePoint 2013 and SQL Server 2014
  • How to Install SharePoint Foundation 2013 with SQL Server 2014 Express.
  • SQL Server 2014 Express Actual Memory Limit.
  • How to Start and Configure SharePoint Foundation 2010 Search
  • How to Install and Configure Search Server 2010 Express

Tweet #SharePoint 2013 Follow @netometer

Stay tuned on NetoMeter – subscribe to NetoMeter RSS.

Dean

0 FacebookTwitterPinterestLinkedinWhatsappTelegramViberEmail
Free Screencasts

Screencast: Deploying StarWind Virtual SAN and Scale-Out File Server

by admin September 4, 2014
NetoMeter Presents :
How to Install and Configure StarWind Virtual SAN and Scale-Out File Server

  • Plan, Install, and Configure a 2-Node StarWind Virtual SAN
  • Deploy a Scale-Out File Server for Applicatons

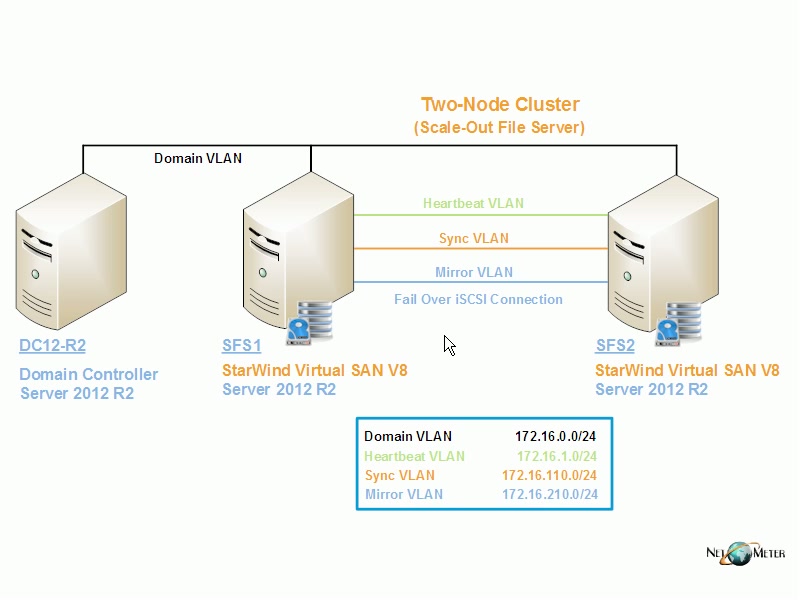
In this Step-by-Step Screencast, we demonstrate how to deploy a basic 2-node StarWind Virtual SAN and a Scale-out File Server for Application Data.

You can download the <a href=”https://www.netometer.com/downloads/How-to-Install-and-Configure-Scale-Out-File-Server-with-StarWind-SAN.txt” target=”_blank” rel=”noopener noreferrer”><img decoding=”async” src=”/wp-content/uploads/script-icon.jpg” alt=”PowerShell Commands” width=”25″ height=”21″>PowerShell commands</a> that we are using in the demo.

Step1: Installing prerequisites and StarWind Virtual SAN software

How to Deploy StarWind Virtual SAN and Scale-Out File Server

Step2: Configuring Highly Available StarWind Disks

Step2: How to Deploy StarWind SAN and Scale-Out File Server-Cluster

Step3: Configuring iSCSI Connections and Multipathing

Step3: Configuring iSCSI Connections and Multipathing

Step4: Deploying Scale-Out File Server

Step4: Deploying Scale-Out File Server

  • How to Remove a Hyper-V Server 2012 R2 from an Orphaned/Non-Existent Domain
  • How to Configure Storage Tiers – Server 2012 R2
  • How to Install WordPress on Windows Server 2012
  • How to Install SharePoint Foundation 2013 with SQL Server 2014 Express

Tweet #StarWind Follow @netometer

0 FacebookTwitterPinterestLinkedinWhatsappTelegramViberEmail
Free ScreencastsSharePoint

Video: SQL Server 2014 Express Actual Memory Limit

by admin August 12, 2014


Free Video :Notes from the Field:
Don’t be surprised if your SQL Server 2014 Express instance uses more than 1600MB memory

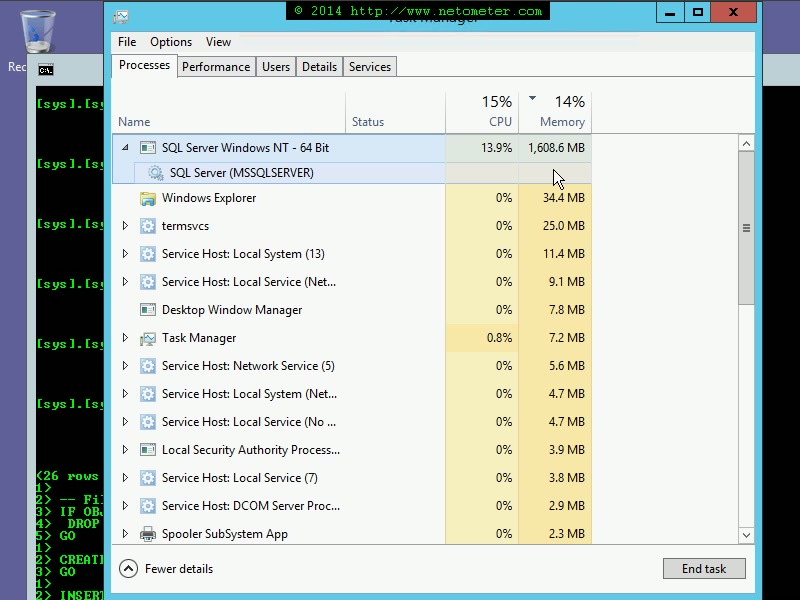
The official SQL Server 2014 Express edition memory limit is 1GB per instance – that is, strictly speaking, the buffer cache restriction. In 2010, the SQL Server MVP Pawel Potasinski confirmed that SQL Server 2008 R2 Express edition, which has the same 1GB memory limit, can actually use about 1400MB of memory. His post is in Polish, so you might have to use Google translate, but the script that he uses and the results are easy to interpret.

In a similar way the SQL Server Pro Kevin Kline confirmed that SQL Server 2012 Express Edition memory working set size can grow around 1.4-1.5GB.

Naturally, with the release of SQL Server 2014 Express edition, it is interesting to check what is the actual memory limit. We’ve used the same script that Kevin Kline posted on his blog:

SELECT
CASE
WHEN database_id = 32767 THEN ‘mssqlsystemresource’
ELSE DB_NAME(database_id)
END AS [Database],
CONVERT(numeric(38,2),(8.0 / 1024) * COUNT(*)) AS [MB in buffer cache]
FROM sys.dm_os_buffer_descriptors
GROUP BY database_id
ORDER BY 2 DESC;
GO

— Assess amount of tables resident in buffer cache
SELECT
QUOTENAME(OBJECT_SCHEMA_NAME(p.object_id)) + ‘.’ +
QUOTENAME(OBJECT_NAME(p.object_id)) AS [Object],
CONVERT(numeric(38,2),(8.0 / 1024) * COUNT(*)) AS [MB In buffer cache]
FROM sys.dm_os_buffer_descriptors AS d
INNER JOIN sys.allocation_units AS u ON d.allocation_unit_id = u.allocation_unit_id
INNER JOIN sys.partitions AS p ON (u.type IN (1,3) AND u.container_id = p.hobt_id) OR (u.type = 2 AND u.container_id = p.partition_id)
WHERE d.database_id = DB_ID()
GROUP BY QUOTENAME(OBJECT_SCHEMA_NAME(p.object_id)) + ‘.’ + QUOTENAME(OBJECT_NAME(p.object_id))
ORDER BY [Object] DESC;
GO

— Fill up Express Edition’s buffer allocation
IF OBJECT_ID(N’dbo.test’, N’U’) IS NOT NULL
DROP TABLE dbo.test;
GO

CREATE TABLE dbo.test (col_a char(8000));
GO

INSERT INTO dbo.test (col_a)
SELECT REPLICATE(‘col_a’, 8000)
FROM sys.all_objects
WHERE is_ms_shipped = 1;

CHECKPOINT;
GO 100

select scheduler_id,cpu_id, status, is_online from sys.dm_os_schedulers where status=’VISIBLE ONLINE’

select cpu_count from sys.dm_os_sys_info

You can download the [tip label=”script” style=”1″ href=”https://www.netometer.com/downloads/SQL-Test.txt”]SQL-Test.txt SQl Server 2014 Express Memory Limit[/tip] that we are using in the demo.

[raw]In the following short video, we demonstrate that the actual SQL Server 2014 Express memory limit is over 1600MB. In addition, you will see how the “1 Socket/4 Cores” restriction is applied when running SQL Server 2014 Express on a Virtual Machine.[/raw]

SQL 2014 Express Memory Limit More than 1GB
  • How to Install SharePoint Foundation 2013 with SQL Server 2014 Express
  • How to Install and Configure Remote Blob Storage in SharePoint 2013 and SQL Server 2014.
  • How to Start and Configure SharePoint Foundation 2010 Search
  • How to Install and Configure Search Server 2010 Express

Tweet #SQL2014 Follow @netometer

0 FacebookTwitterPinterestLinkedinWhatsappTelegramViberEmail
Latest ScreencastsSharePoint

How to Install SharePoint Foundation 2013 with SQL Server 2014 Express

by admin July 28, 2014


Screencast :SharePoint 2013 Installation on Server 2012 R2

  • Create and configure the required domain accounts
  • Slipstream the latest SQL Server 2014 CU into the installation files
  • Optimize SQL Server 2014 for SharePoint 2013
  • Install SharePoint 2013 and perform the initial Farm configuration

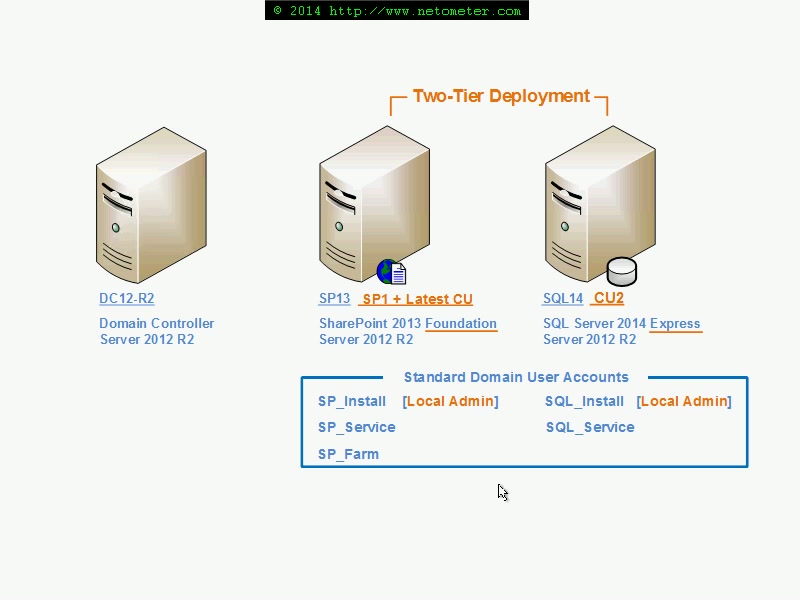
In this step-by-step Screencast How to Install SharePoint 2013 with SQL Server 2014, we demonstrate how to install SharePoint 2013 Foundation on Server 2012 R2. In addition, we demonstrate in details the installation, configuration, and optimization of SQL Server 2014 Express for SharePoint 2013 on a separate Windows 2012 R2 member server, which is the so called two-tier deployment.

SharePoint 2013 Foundation and SQL Server 2104 Express are both free editions and come with certain limitations. As you will see in our demo, the SQL Server 2014 Express memory limits are actually higher than the official 1GB buffer cache per instance. In addition, implementing Remote Blob Storage (using the FileStream provider) allows documents and files to be stored on the file system instead of inside the database itself. As a result, you get improved performance, and you get past the 10GB per database SQL express limit for your content databases. To keep things simple, we will demonstrate configuring Remote Blob Storage with SharePoint 2013 using SQL Server 2014 Express in a separate Screencast.

How-to-Install-SharePoint-2013-Foundation
  • How to Install and Configure Remote Blob Storage in SharePoint 2013 and SQL Server 2014.
  • SQL Server 2014 Express Actual Memory Limit.
  • How to Start and Configure SharePoint Foundation 2010 Search
  • How to Install and Configure Search Server 2010 Express

Tweet #SharePoint 2013 Follow @netometer

Stay tuned on NetoMeter – subscribe to NetoMeter RSS.

Dean

0 FacebookTwitterPinterestLinkedinWhatsappTelegramViberEmail
Newer Posts
Older Posts
November 2026
M T W T F S S
 1
2345678
9101112131415
16171819202122
23242526272829
30  
« Nov    

NetoMeter Blog

  • Video Updates
  • Upcoming Videos
  • Community Chatrooms
  • Community Forum
Facebook Twitter Rss Envelope

Useful Links

    • Contact Us
    • Collaboration
    • Adverstising
    • Privacy Policy
    • Feedback
    • Terms of Use
    • Help & Support
    • News Covering
    • Trending Now

Edtior's Picks

ACMEExchange Let’s Encrypt Client: How to Install a LE Certificate in Exchange Server
Coming Soon: How to Migrate File Servers to Server 2022
Screencast (Part 2): How to Upgrade from Exchange 2013 to Exchange 2019

Latest Articles

ACMEExchange Let’s Encrypt Client: How to Install a LE Certificate in Exchange Server
Coming Soon: How to Migrate File Servers to Server 2022
Screencast (Part 2): How to Upgrade from Exchange 2013 to Exchange 2019
Screencast: How to Upgrade from Exchange 2013 to Exchange 2019
NetoMeter Blog
  • Home
  • Windows Server
  • Exchange Server
  • SharePoint
  • Tools
    • ACMEExchange Client
NetoMeter Blog
  • Main Site >>
  • Home
  • Windows Server
  • Exchange Server
  • SharePoint
  • Latest Videos
  • Upcoming
©2024 NetoMeter All Right Reserved.