

Server 2003 comes out of support in July 2015, and the statistics show a surprisingly high number of legacy servers still running in production. It comes as no surprise that a lot of migration projects will be rolling out, and to help you on this path, we’ve already covered some of the most common scenarios that involve Server 2003:
– Active Directory upgrade
– Exchange server upgrade
– DHCP migration (including Failover configuration)
In this screencast, we demonstrate how to migrate Server 2003 File Servers.
The logical choice of a destination server is Server 2012 R2, as it provides the required redundancy – Storage Spaces with two-way or three-way mirroring, and performance boost – Tiered Storage and Write-Back Cache (WBC).
We’ve already demonstrated how to implement Storage Tiers with SSD drives and custom WBC on Server 2012 R2, which provides automatically moving of the hot blocks of data onto the fast SSD and improved write performance. In this case, if you are planning to migrate multiple legacy file servers, it makes sense to consolidate them into a single Server 2012 R2 machine, and that’s the scenario we cover in our screencast.
The key requirements in this project are:
– Preserving the existing Sharing and Security permissions.
– Preserving the UNC Share paths, so no reconfiguration of the clients and applications is required.
– Minimizing downtime
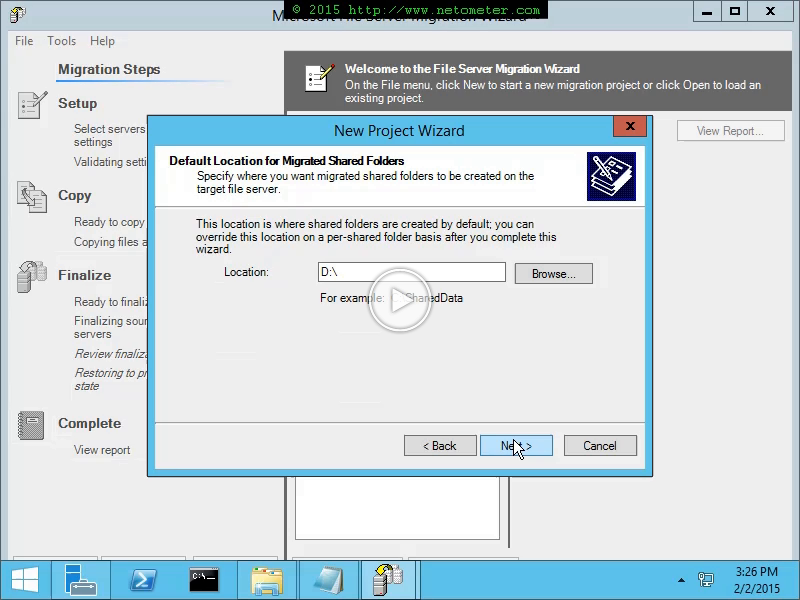
To cover these requirements, we’ll be using the Microsoft File Server Migration Toolkit. That nice, simple, and free package allows you to migrate data in two passes. During the first pass, users can still access the file shares, and you can perform it during regular working hours. The second pass performs the actual cut over, when the delta is copied and applied to the destination shares and client access is interrupted.
Finally, we demonstrate an elegant way to preserve the UNC paths and restore access to the migrated file shares on the destination server right away, effectively minimizing downtime.
For your convenience, we provide the text file with our project plan and the commands that we are using in the screencast here  .
.