

Out of the box, Exchange 2016 comes preconfigured with three self-signed certificates:
– Microsoft Exchange – enabled for all exchange services (except Unified Messaging) and used to encrypt client connections that are proxied from the Client Access services as well as internal communication between Exchange servers.
– Microsoft Exchange Server Auth Certificate – provided for cross-product functionality (SharePoint and Lync server) using Oauth authorization.
– WMSVC – used by the Web Management service in IIS (for remote management).
Normally, when we are talking about installing or replacing an Exchange certificate, we are referring to the first one. The out of the box certificate with friendly name Microsoft Exchange and common name the Exchange short NetBIOS name is trusted automatically by all Exchange servers in the organization, including the Edge Transport servers, which makes it perfectly fine for encrypting the internal communication between Exchange servers. Unfortunately, that’s not the case when it comes to encrypting client connections to the Exchange CAS – the Microsoft Exchange self-signed certificate is not trusted by internal and external clients. It is recommended to replace this self-signed certificate with a trusted Commercial certificate as soon as possible.
Until recently, there wasn’t much of a choice; we had to purchase a commercial multiple domain (SAN) certificate from one of the trusted CA on the web or use another self-signed (or internal CA issued) certificate and make it trusted by a Group Policy or manual import of the certificate to the client. During the years, we’ve covered in detail all these scenarios in our screencasts.
There are two major issues when using a trusted certificate issued by a traditional commercial CA with Exchange server:
– The process is extremely manual – that includes all stages: checking for certificate expiration, generating and submitting a Certificate Signing Request (CSR), confirming domain ownership, and installing the issued certificate together with the included intermediates.
– The process is not secure – domain ownership is confirmed via an email sent by the CA; that communication is not digitally signed and encrypted.
With that said, we have a game changer when it comes to certificates in general and Exchange Multiple Domain (SAN) certificates in particular – the ACME (Automated Certificate Management Environment) protocol and the Let’s Encrypt certificate authority based on this new protocol.
Let’s Encrypt is a free, automated, and open certificate authority provided by the Internet Security Research Group (ISRG). The project is sponsored by major companies like Mozilla, Akamai, Cisco, Chrome, Facebook and more …
Quite often, the ACME protocol is compared to the DHCP – you just plug in the client and it works. The best way to understand a new protocol is to see it in action, and that’s the approach we are following in this screencast. After the mandatory Exchange 2016 Client Access Namespace configuration (step 1), we immediately proceed with the automated request and installation of a Let’s Encrypt Exchange (SAN) certificate so you can see how easy and simple the whole process is (step 2). Then we go slower through each stage of the ACME process and explain what is happening in the background (step 3). Finally, we demonstrate the automatic certificate renewal and how easy it is to add and remove names from the certificate, literally within seconds (step 4).
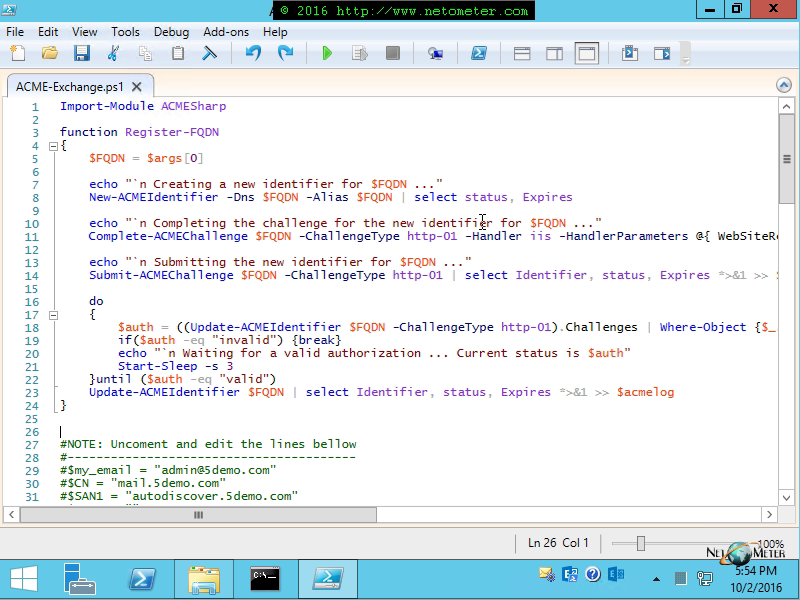
In our demo, the ACME protocol is implemented by the ACMESharp PowerShell module written by Eugene Bekker. The source code is available on GitHub, and we provide as a download the compiled version used in our demo. The text file with the PowerShell commands for the Exchange 2016 Client Access Namespace configuration and the ACME-Exchange.ps1 script used for the automated installation and renewal of Let’s Encrypt Exchange certificates are included in the download package as well.
Important Notice:
The new ACME-Exchange client supporting the ACME protocol v2 is in beta and available. To get it, please send a request at: acme@netometer.com
Video demos and detailed instructions for Exchange 2010/13/16/19 are coming shortly.