NetoMeter Blog
Main Site >>
NetoMeter Blog
NetoMeter Blog
Latest Videos
  • Home
  • Windows Server
  • Exchange Server
  • SharePoint
  • Tools
    • ACMEExchange Client
Main Site >>
Saturday, November 7, 2026
NetoMeter Blog
NetoMeter Blog
  • Main Site >>
  • Home
  • Windows Server
  • Exchange Server
  • SharePoint
  • Latest Videos
  • Upcoming
Main Site >>

©2024 NetoMeter All Right Reserved.
Office 365

How to Add a Domain to Office 365. Plan P – Keep Public Web Site And DNS Zone At Current Hosting Providers – Manually Create DNS Records.

by admin October 30, 2011

One of the challenges which Office 365, Plan P users face is adding a domain name to their account. While fully redelegating your DNS zone is the easiest approach, it is not always the most suitable one, for P Plan Users. Let’s take for example the following scenarios :
– You are under certain restrictions enforced by your Domain Registrar (e.g., .no or .dk domains)
– You have specific technical needs which require that you keep your current DNS and Web Site hosting provider(s)

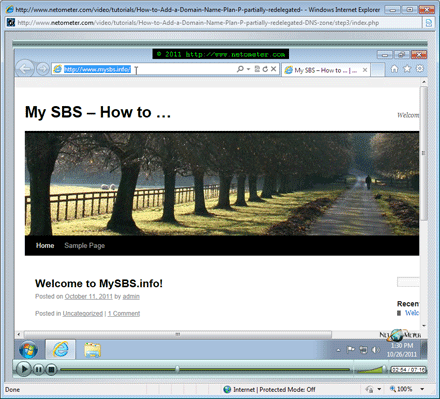
In the following Step-by-Step video tutorial, we demonstrate how to add a domain to Office 365 – Plan P, when using partial redelegation. Effectively, you keep your existing Web Site and DNS zone at your current DNS hosting provider.

How to Add a Domain to Office 365. Plan P - Partially Redelegated DNS Zone.  Keep Public Web Site And DNS Zone At Current Hosting Providers - Manually Create DNS Records.

Stay tuned on NetoMeter – subscribe to NetoMeter RSS.

Dean
0 FacebookTwitterPinterestLinkedinWhatsappTelegramViberEmail
Office 365

How to Add a Domain to Office 365. Plan E – Using SharePoint On a Vanity Domain.

by admin October 14, 2011

In this Step-by-Step video tutorial,, we will demonstrate adding a domain to Office 365, Plan E. While the P Plans are suitable for small companies and come with a lower price, the E plans are designed to cover the needs of companies from 50 to tens of thousands of users and come with much greater flexibility.

As you will see, the process of adding a domain to Office 365 E plan is more complex. On the first place, there is no way to fully redelegate your DNS zone and you need to create the required DNS records manually.

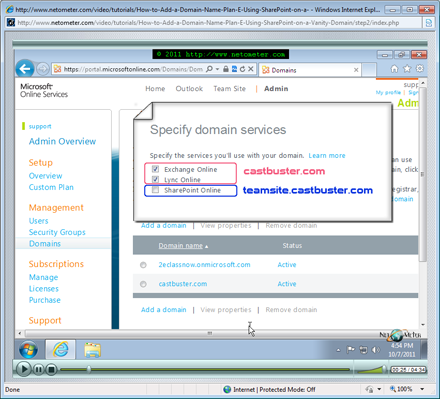
In addition, you have to be careful when specifying Domain services for the domain which you have added, as your root domain cannot be assigned to SharePoint Online together with any other service – Exchange or Lync. Instead, you need to add a third level domain and assign it specifically to your SharePoint Public Website.

As usual, we are following our Step-by-Step approach and at the end we demonstrate the new domain in action: creating a new Global Administrator, configuring Outlook Anywhere and setting a mobile iPad client.

How to Add a Domain to Office 365. Plan E – Using SharePoint On a Vanity Domain

Stay tuned on NetoMeter – subscribe to NetoMeter RSS.

Dean

0 FacebookTwitterPinterestLinkedinWhatsappTelegramViberEmail
Office 365

How to Add a Domain to Office 365. Fully Redelegating the DNS Zone.

by admin September 30, 2011

One of the tasks which you have to perform after you subscribe to Office 365 is adding a DNS domain. Of course, you can continue using indefinitely the default domain – availablename.onmicrosoft.com, provided by Microsoft without any problem. There is a pretty good chance that you are already using or just own a domain name (e.g., yourbusiness.com) or you are planning to buy a domain, which describes better your business.

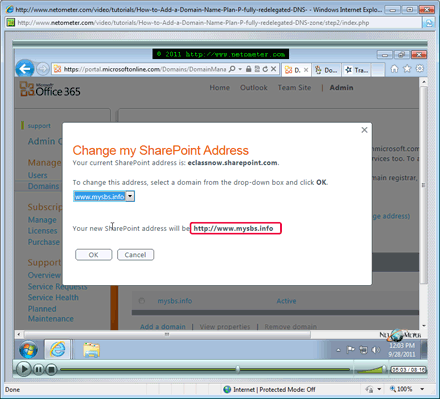
In the following Step-by-Step video tutorial, we demonstrate how to add a Domain to Office 365 in plan P3. There are two methods to verify your domain – adding a TXT record and adding an MX record, and we demonstrate both of them. As you will see, P plans provide the option to point the Name Servers of your domain to Microsoft’s DNS servers and use the so called Fully Redelegated DNS zone. Effectively, this means that you are switching the administration of the DNS zone to Microsoft, and the required DNS records will be created automatically for you. In addition, if in the future new services are added to your plan, the required DNS records will be created again, automatically.

How to Add a Domain to Office 365. Fully Redelegating the DNS Zone.

Stay tuned on NetoMeter – subscribe to NetoMeter RSS.

Dean
0 FacebookTwitterPinterestLinkedinWhatsappTelegramViberEmail
Exchange Server 2010

How to Configure OWA as the Default Web Page in Exchange 2010

by admin September 25, 2011

Setting Outlook Web App as the default page in Exchange 2010 CAS server makes life easier for end users. It saves them the effort to type the precise OWA address, and of course the error messages when they mistype it or forget to use secure socket layer (SSL) connection.

Using http redirection for the Default Web Site and forwarding all requests to the OWA directory might seem as an easy approach but it brings up two problems. First, changes in the root directory settings are propagated automatically to all subfolders and affect all Exchange virtual directories. Cleaning up the mess and restoring the default settings of the subdirectories should be done manually. Second, the permissions of the web.config file, generated under the OAB directory prevent local Outlook users as well as remote Outlook Anywhere users from downloading the Offline Address Book – adjusting the security settings of this file is required.

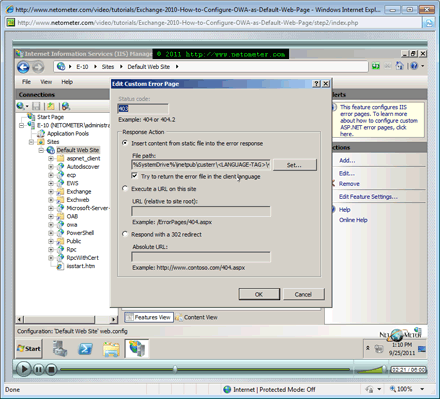
In the following Step-by-Step video tutorial, we demonstrate how to configure OWA in Exchange 2010 CAS server as the default web page. The Exchange 2010 server is running on Windows Server 2008 R2, and we are dealing with IIS7.5.

How to Configure OWA as the Default Web Page in Exchange 2010

Stay tuned on NetoMeter – subscribe to NetoMeter RSS.

Dean

0 FacebookTwitterPinterestLinkedinWhatsappTelegramViberEmail
Exchange Server 2010

How to Install and Configure Exchange 2010 Edge Transport Server

by admin September 17, 2011

The Edge Server is one of the Exchange 2010 server roles.

An organization can choose to not have an EDGE server and still have a fully functional messaging environment. As we demonstrate in our Screencast Exchange Server 2010 Initial Configuration, you can configure an Exchange 2010 Hub Transport server to receive directly messages from the Internet.
However, a standard Exchange server is an attractive target. In case of a security breach it might allow an attacker access to mailboxes and Active Directory data. Here comes into play the Edge server as a lean, locked-down standalone version of Exchange server. The data, synchronized one way – from the internal AD into the local instance of AD LDS (Active Directory Lightweight Directory Service) is hashed, which makes it of little use to an attacker. In addition, the EDGE server is running a truncated version of Exchange Management tools. As you will see, the EMC (Exchange Management Console) is showing data just for the local Edge server and has quite a limited functionality. The same way EMS (Exchange Management Shell) supports a limited set of cmdlets.

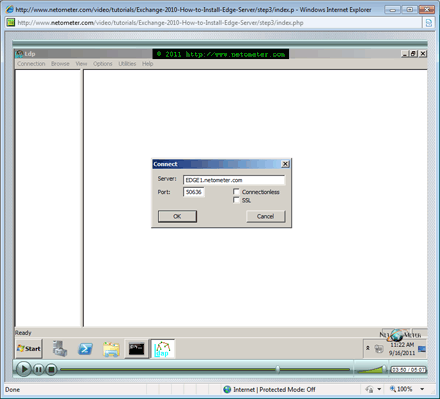
In the following Step-by-Step video tutorial, we demonstrate the installation and initial synchronization of Exchange 2010 SP1 Edge Transport server on Windows 2008 R2 OS.

How to Install and Configure Exchange 2010 Edge Transport Server

Stay tuned on NetoMeter – subscribe to NetoMeter RSS.

Dean
0 FacebookTwitterPinterestLinkedinWhatsappTelegramViberEmail
Small Business Server 2011

How to Configure Smart Host in SBS 2011

by admin September 11, 2011

The default Exchange Server configuration in SBS 2011 is performed when you run the Setup Your Internet Address wizard. There are two ways you can send outbound e-mail to the Internet from SBS 2011:
– Direct delivery – using DNS to send e-mails directly to recipient server.
– Using a forwarding server – Smart Host, which is set up to accept e-mails for forwarding and route them to the correct destination.
The default Exchange 2010 configuration in SBS 2011 is using the first method – Direct Delivery.

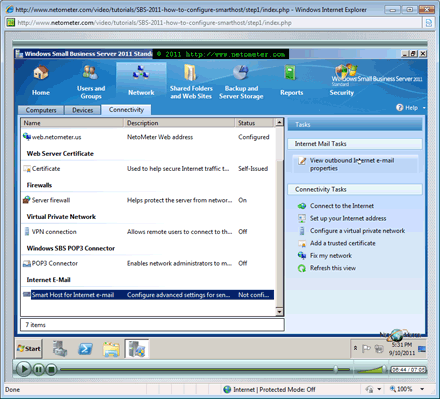
In the following Step-by-Step video tutorial, you will see how to configure Smart Host in Small Business Server 2011.

How to Configure Smart Host in SBS 2011 - Getting Started Tasks

Stay tuned on NetoMeter – subscribe to NetoMeter RSS.

Dean

0 FacebookTwitterPinterestLinkedinWhatsappTelegramViberEmail
Small Business Server 2011

How to Set Up Internet Address in SBS 2011

by admin August 14, 2011

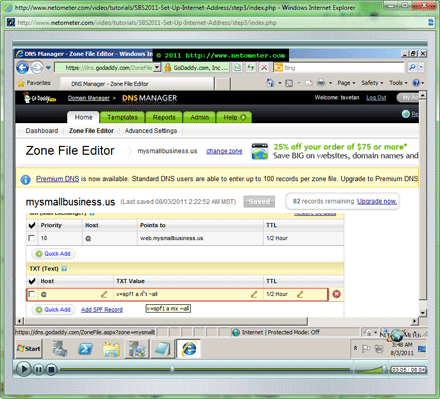
Setting up the internet address of Small Business Server 2011 is one of the most important tasks. It involves configuration changes on the local router, on the SBS 2011 server itself, and on the external DNS zone for the internet name which you have chosen.

In the following Step-by-Step video tutorial, we will cover two different scenarios when demonstrating the Set Up Internet Address wizard.
First, you will see the ideal scenario, where we perform all configuration tasks through the wizard and everything works without a problem. This involves configuring automatically the required ports on the local router, purchasing a domain name and configuring the external DNS zone for that internet name.
Then, we will discuss in details the configuration changes which have been introduced in the background, and we will demonstrate a more realistic scenario, where you have to configure manually the required ports on the local router and the necessary DNS records in the external DNS zone.

How to Set Up Internet Address in SBS 2011 - Getting Started Tasks

Stay tuned on NetoMeter – subscribe to NetoMeter RSS.

Dean
0 FacebookTwitterPinterestLinkedinWhatsappTelegramViberEmail
Small Business Server 2011

How to Connect to the Internet SBS 2011 Standard – Getting Started Tasks

by admin July 30, 2011

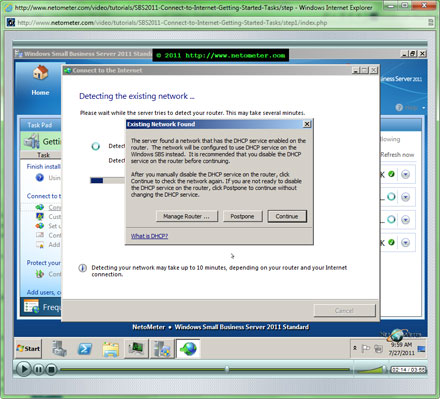
In the following Step-by-Step video tutorial, you will see a demonstration of CIW – Connect to the Internet wizard. One of the common problems which you might encounter is the infamous message – The server found a network that has the DHCP service enabled on the router . This way SBS 2011 enforces itself as a DHCP server on the LAN as you cannot complete the CIW without first disabling any existing DHCP servers. We demonstrate this scenario in our demo using a popular NetGear router.

How to Connect to the Internet SBS 2011 Standard - Getting Started Tasks

Stay tuned on NetoMeter – subscribe to NetoMeter RSS.

Dean

0 FacebookTwitterPinterestLinkedinWhatsappTelegramViberEmail
Small Business Server 2011

How to AutoSync SBS 2011 Administrator Password with DSRM Account Password

by admin July 16, 2011

The SBS Administrator account which you create during SBS 2011 standard setup is synchronized with the DSRM (Directory Services Restore Mode) account password. That way, if you need to boot in Directory Service Restore mode and perform Active Directory Repair operations you will be able to use the SBS administrator password.

There is a hidden problem though. You might expect that when you change the SBS administrator account password, it will be automatically synchronized with the underlying DSRM account password. Unfortunately, this is not the case. By default SBS accounts are forced to change password every 180 days and it is quite possible that the original SBS Administrator password (set during the installation process) gets lost in time. As you can guess, this presents a serious problem if you need to boot in DSRM and recover from a problem with Active Directory.

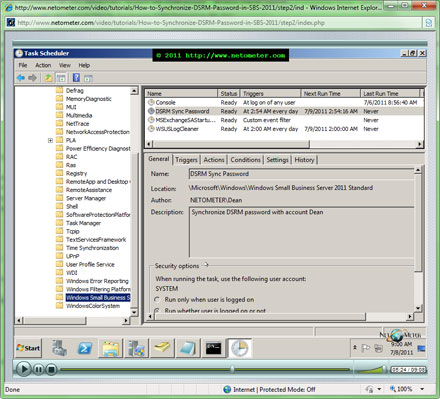
In the following Step-by-Step video tutorial, we will demonstrate two approaches for synchronizing the SBS Administrator account password with DSRM account password. First, you will see how to perform a manual synchronization. Then, we will show you how to use Task Scheduler and automate the whole process.

Testing the result is very important in this case, and we will also demonstrate how to boot and login in DSRM, after a password change.

How to Synchronize Automatically SBS 2011 Administrator Password with DSRM Account Password

Stay tuned on NetoMeter – subscribe to NetoMeter RSS.

Dean
0 FacebookTwitterPinterestLinkedinWhatsappTelegramViberEmail
Small Business Server 2011

How to Install SBS (Small Business Server) 2011 Standard Edition

by admin June 29, 2011

SBS (Small Business Server) 2011 is an all in one suite based on Windows Server 2008 R2. It comes in two editions:

• Windows Small Business Server 2011 Standard
• Windows Small Business Server 2011 Essentials

The standard edition provides a complete server solution for small businesses with up to 75 users. It includes Exchange 2010 SP1, SharePoint Foundation 2010, WSUS and of course, the Windows Server 2008 R2 technologies.

SBS 2011 Essentials is a more limited and simplified solution for small businesses with up to 25 users. It does not include Exchange, SharePoint and WSUS, provides only core infrastructure services and is designed to facilitate the connection to the cloud.

In a series of Screencasts we will present Step-by-Step both editions of SBS 2011.

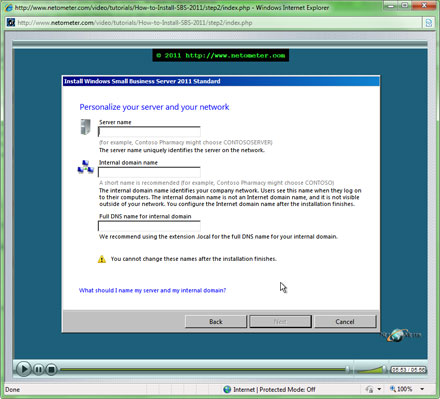
In the following Step-by-Step video tutorial, you will see how to install SBS 2011 standard edition.

How to Install SBS (Small Business Server) 2011 Standard Edition

Stay tuned on NetoMeter – subscribe to NetoMeter RSS.

Dean

0 FacebookTwitterPinterestLinkedinWhatsappTelegramViberEmail
Newer Posts
Older Posts
November 2026
M T W T F S S
 1
2345678
9101112131415
16171819202122
23242526272829
30  
« Nov    

NetoMeter Blog

  • Video Updates
  • Upcoming Videos
  • Community Chatrooms
  • Community Forum
Facebook Twitter Rss Envelope

Useful Links

    • Contact Us
    • Collaboration
    • Adverstising
    • Privacy Policy
    • Feedback
    • Terms of Use
    • Help & Support
    • News Covering
    • Trending Now

Edtior's Picks

ACMEExchange Let’s Encrypt Client: How to Install a LE Certificate in Exchange Server
Coming Soon: How to Migrate File Servers to Server 2022
Screencast (Part 2): How to Upgrade from Exchange 2013 to Exchange 2019

Latest Articles

ACMEExchange Let’s Encrypt Client: How to Install a LE Certificate in Exchange Server
Coming Soon: How to Migrate File Servers to Server 2022
Screencast (Part 2): How to Upgrade from Exchange 2013 to Exchange 2019
Screencast: How to Upgrade from Exchange 2013 to Exchange 2019
NetoMeter Blog
  • Home
  • Windows Server
  • Exchange Server
  • SharePoint
  • Tools
    • ACMEExchange Client
NetoMeter Blog
  • Main Site >>
  • Home
  • Windows Server
  • Exchange Server
  • SharePoint
  • Latest Videos
  • Upcoming
©2024 NetoMeter All Right Reserved.